It's been said to make good joinery use a pencil to make great joinery you must have a knife. Today I finally became fed up with my old exact-o knife a decided to make my very first marking knife. This venture started with an old scrap piece of cherry and a 5/16 spade bit. I did not take pictures during the making if this knife as I should have. I will try to describe my steps as best I can. First I used my grinder to grind the bit to shape creating a V on the end of the bit. I then ground a 30° bevel on one side of the to be knife blank. Finally I cut the shank down leaving about a 3 in tang on the knife blank. I then turned to my sharpening stones and flattened the back as the knife is only beveled on one side allowing for a sharp line shoulder on what ever side I need. I then turned to my lathe to create the handle blank out of scrap cherry. Before placing the blank on the lathe i predrilled the hole for the knife blank slightly smaller then the tang. I then used a short piece of brass as a compression fitting to prevent splitting when the knife was inserted. After the handle was finished I inserted the knife blank and used shellac with some red dye to add a nice warm color. This will probably be my new favorite tool for a while. Hope you enjoy the pictures.
Thursday, April 18, 2013
Tuesday, March 26, 2013
More lessons from the bench!!!
So I finally got around to putting finish on the bench I've been working on. It's being made for a friend and coworker and wanted it to somewhat match his existing table. I started with stain and some test boards only to find I was getting nowhere near the color I needed with the stains I have. I then turned to water based dyes. I found a red dye that looked like it would give the color needed after some tests I found the color I was looking for. As this is my first real finish job it took a couple days to get up the nerve to start laying down the dye. With the dye down i topped coated it with a one pound cut solution of shellac to give a little protection and shine. Hope these pictures allow the colors to come through.
Sunday, March 17, 2013
A bench can teach a lot of lessons.
I was recently commissioned to create a bench for a co-worker. This project started with some rough sewn white oak lumber. I found this to be a fun project as I was given lots of freedom to let my style show. I designed this bench with all classic joinery. This was a great learning experience as I started by having to flatten out the lumber and smooth it out squaring up all the sides. I then went to work on the joinery. The top is joined using wedged through mortise and tenons while the lower section is attached using keyed through mortise and tenons. The keys are created out of cherry. All the tenons are hand sewn and chopped out by hand at an 80 degree angle. The mortises were drilled out and cleaned up by hand. The following pictures show off my work to date. I will be adding more pictures when I get the finishing done.
Sunday, March 10, 2013
The Lathe enters the shop.
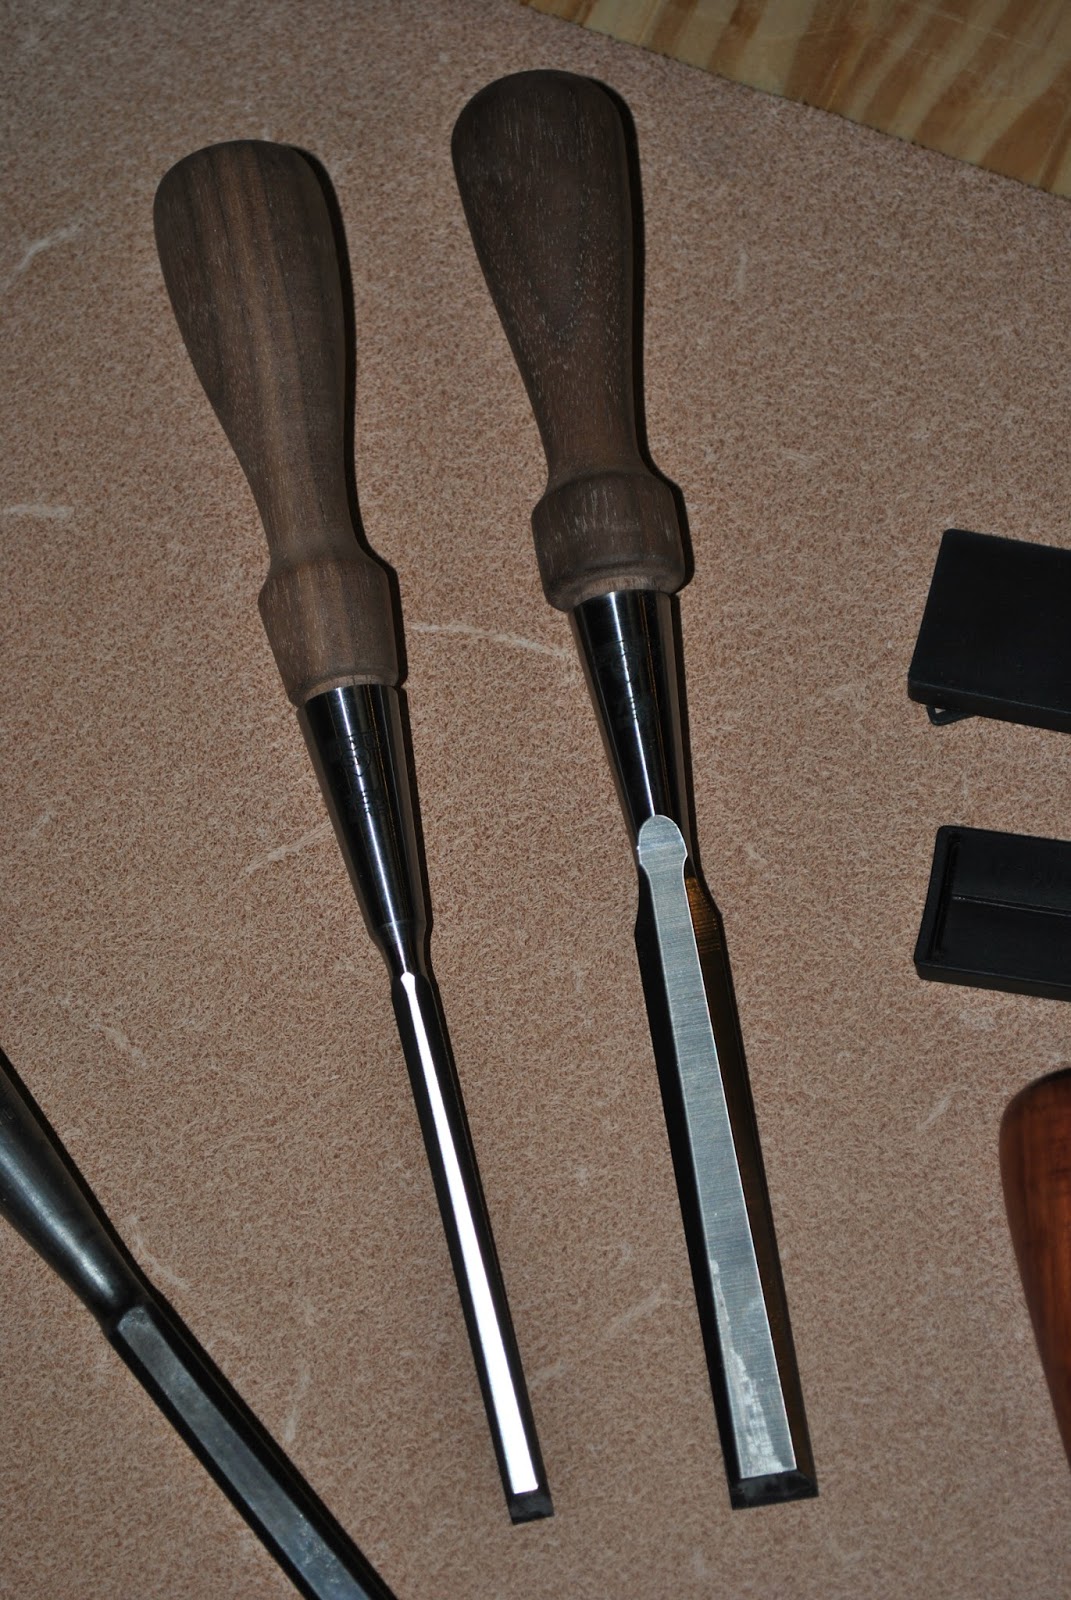
I wanted to try my hands in lathe turning so I found a cheap lathe and started cranking out some turned products. I have yet to make any major projects but have done some playing around and have a few projects to show so far. First I made wine toppers using walnut and a piece of osage orange. Then I put my hands to work trying to make a bowl created from a large chunk of walnut supplied by a friend. After this I wanted to customize my new set of Stanley Sweetheart chisels by turning some handles out of walnut. To this date I have been able to turn 2 handles so far but when I get a chance I will finish turning the handles needed for all my chisels.
Just in time for Christmas.
This year Christmas was a homemade venture in woodworking. My wife and I both got into the act as she made finger paints for the kids I got to work in the shop making cutting boards for the parents and grandparents. The cutting boards are made from cherry, bubinga, purpleheart and zebra wood. The main attraction though had to be the custom made rocking horse. This was the biggest woodworking venture to date. The rocking horse is made from white oak salvaged from couches I was lucking enough to get when my work got to new ones for all the units. The rocking horse also contains cherry inlays to make up the bridle of the horse as well as a fabric covered saddle with brass studs.
All hand tool users needs a bench and this is mine.
After doing some research and learning from my previous attempt at a workbench I finally got started on my own roubo inspired workbench. I found that with my passion for hand tools and classic joinery growing I would need a bench that would allow my passion to keep growing. I started with some southern yellow pine purchased from the local home store. I was wanting to find some 4x4 lumber but had to settle with 2x6 so I purchased about 6 boards and began to rip them down the middle giving my a lot of 2x3's which I would use to laminate up and create my bench top which is about 3 inches thick 6 feet long and 20 inches deep. I then took the rest of the 2x3's and laminated then up to make the 4 legs as well. The bench is up together in my classic style of joinery using through mortises wedged in from the top. While creating the top I also added a custom built wagon vise containing a solid hard maple wooden screw which I turned and tapped myself. It have a row of dog holes that aid the wagon vise in holding lumber flat on my bench needed for planing and other prep work. I then got started on the custom leg vise created from cherry lumber and another custom turned hard maple wooden screw. I used leather on the jaw to keep from marring wood while using this vise. This provides clamping power needed to work both on woods edge and the ends when jointing the edges and making cuts on the ends. I have been using this bench now for some time and have found that I really love this bench and this have been the best thing I have built to date. It is very solid and weights about 200 to 300 pounds which aids it in staying put when using all my hand tools.
I then got into the frame business.
I then found myself in the frame business which is were i got my real start getting my hands on attempting classic joinery in mortice and tenon joints. My first frame was put together for a neighbor and friend made out of rough cut cherry lumber. I framed a 2x4 foot chalk board. After this I got my first chance to really make some money and hang my handy work in a place for all to see. I was commissioned by the owner of a local tavern who saw my first frame and was in need of a much large chalk board to display their specials. I again was able to put some classic mortise and tenon joinery to work and built a frame around a 4x8 chalk board which now hangs largely at the local establishment.
Subscribe to:
Posts (Atom)